Cure Fuel Vapour Lock in the P6B for good
What is fuel vapourisation/vapour lock?
Well, your car is likely to be standing in heavy traffic and the engine will just simply die for no apparent reason. Nothing will persuade it to restart until you’ve been stood for around 20 minutes – or more! Just about the length of time it will take for breakdown recovery to reach you, at which point it will start at first turn of the key and drive perfectly normally!
There are a couple of electrical maladies that have similar symptoms. A coil on the way out can fail when it gets really hot and resume working when cool. And defective condensers (for those still on points) can sometimes behave like this. But in the main the problem will be fuel vaporisation.
What can I do about it?
There is no single simple fix for this, but there are a series of small defects which can combine to give the problem. From our own observation, the problem is caused by petrol boiling within the carburettor float chamber. Once this occurs, it is extremely difficult for the standard mechanical fuel pump to overcome the back pressure generated and the car will stall. Very occasionally, the boiling occurs earlier: in the section of fuel delivery pipe that runs along the base of the engine block underneath the exhaust manifold on the passengers (left hand) side en route to the pump.
Historically, many people have fitted an electric pump, the stronger action of which can overcome the problem. But if your car is in good order there should be no need for this.
Since the basic problem is most likely to be the carburettors getting too hot in the first place, first attention should turn to the cooling system. Especially if there is any hint that your car is struggling to maintain normal temperature when idling in traffic, then the first action is to flush the entire system thoroughly. This should include the heater matrix as this is active in the coolant circuit at all times and cabin comfort is maintained by blending hot and cold air in a chamber in the heater box, rather than by the more normal method of varying the flow through the matrix with a cable-operated stopcock.
Once you are no longer getting any debris out of the coolant system, fill it with fresh water (but not antifreeze yet). Run the engine up to temperature with the radiator cap off. Does the thermostat open nice and promptly? If not, or you are not sure, change the thermostat. The correct stat for the car is a 84°C with a small pilot hole in the brass ring surrounding the actual ‘stat. This is to allow coolant to bypass the stat at all times. If it isn’t there, the stat will open very late because the hot coolant can’t get near to it easily. You can modify a blank stat by simply drilling a 1/8” hole in the brass ring. The hole should be at 12 o’clock looking from the front of the car.
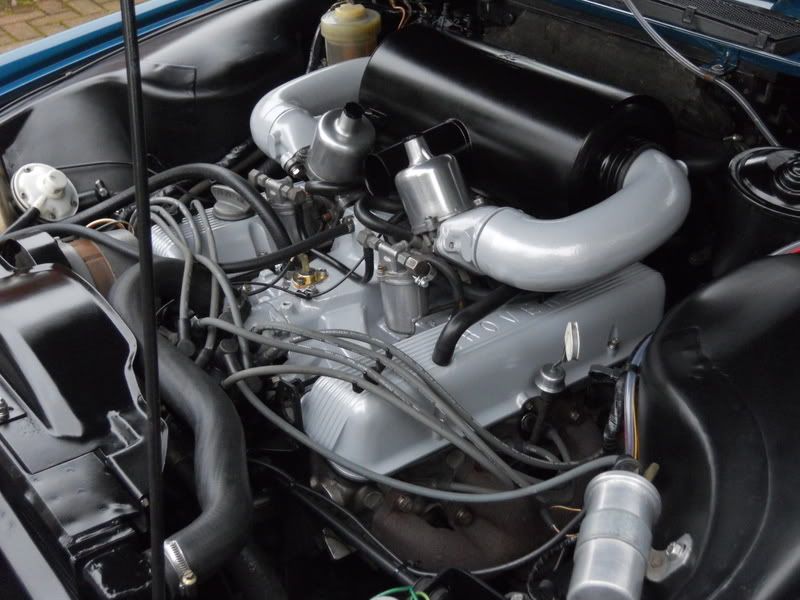
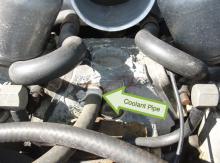
Now rev the engine hard, still with the radiator cap off. Looking into the top of the radiator you should be able to see a strong jet of coolant coming from the pipe that enters the radiator close to the filler neck. This pipe comes from the front of the “carb tower” between the carburettors on the inlet manifold (see picture). If the jet of coolant isn’t there, then you may have either an internally collapsed hose, or the inlet manifold is blocked just behind the pipe outlet. You can check both by simply removing the pipe at the manifold end. If coolant flows out, the pipe is the problem, if not it’s the manifold. To clear the manifold, insert a small jewellery screwdriver into the pipe outlet and wield a large hammer at it vigorously – yes, we said vigorously.
With this outlet blocked the inlet manifold will not be properly cooled and the build up of heat will transfer into the carburettors and cause the boiling we are trying to avoid. So you have found the major cause of your vaporisation.
Don’t stop here though. Having got clean water all through the engine and the correct flow through both the thermostat and the inlet manifold, a bit of chemical cleaning is a good plan. Our recommended technique is to add a dishwasher cleaning solution to the coolant – two bottles of the “well known supermarket product” should do the job. Then run the engine at moderate rpm with the thermostat open – i.e. up to temperature – and radiator cap off until all foaming from the radiator stops. Be warned though, this technique will find any old hoses or other potential leaks all round the engine. You might even want to have a set of new hoses on standby if you know that yours are old. When all has settled, flush the engine, radiator and heater very thoroughly with clean water. Then, assuming no leaks have been revealed, you can top up with antifreeze to a 50/50 mix with the water.
Note that the correct antifreeze is an inorganic additive technology (IAT) one with silicate corrosion inhibitors, normally blue in colour. A good example is Bluecol 2 year antifreeze.
That’s the major part of the investigation and repairs done. You may even find that this treatment has reduced the tendency of your car to pink.
Upgrades to improve cooling performance
Engine cooling can be further improved by fitting a radiator expansion tank, otherwise known as a header tank. A suitable design was introduced with the SD1 and is also used across Land Rover, MGB and many other BMC and Triumph models of the period. This can be located on the bulges in the inner wings. The radiator cap is then replaced with a blank cap and the pressure cap is transferred to the header tank. Your radiator will then always be full to the brim with all the cooling fins permanently in use, and the fluctuation in coolant level that occurs between a cold and hot running engine will be in the header tank instead of the radiator.
Addtional benefical improvements
Bonnet fitment
There are still a few more details to look at. Does your bonnet fit very tightly, especially at the back near the windscreen? This will trap hot air in the engine bay. Adjust the bonnet hinges, by using packing washers between them and the body so that air can escape along the sides of the bonnet. In the same vein, ensure that the underbonnet sound blanket is tight to the bonnet at the edges over the inner wings, so as to give space for air to circulate. And adjust the front of the bonnet down to make sure all incoming air goes through the grille to the radiator, and not over the top of it.
Fuel line insulation
Early cars have insulation pads between the fuel lines and the engine, later cars don’t. It is a good idea to retrofit this if your car hasn’t got them. The most important places are between the fuel line and block under the exhaust manifold, and between the fuel lines and the inlet manifold between the carbs. A bit of aluminium foil around the insulation to act as a heat shield against the exhaust manifold might also be wise move.
Verify the tune of your engine
Verify correct ignition timing, with working vacuum advance and centrifugal advance, and correct fuel richness and carb balance. If these are off-tune the engine will tend to run hotter than intended.
Still having problems?
Three-core radiator
If the engine still shows signs of overheating in traffic, then it is time to renew the radiator core. The P6 V8 is widely recognised as being undercooled, and it is a good idea to replace the standard two row radiator with a three row one. Any local radiator repair firm will be able to do this for you, no need to be going ordering reconditioned radiators from far away.
This step will usually cure most cars, but some still resist. If you still have fuel vaporisation, you have no option but to go down the electric pump route.
Electric fuel pump
There is a significant safety hazard involved in doing this. A club member recently lost his P6 to an underbonnet fire caused by either a fuel hose bursting or, more likely, the fuel pump pressure regulator dismantling itself.
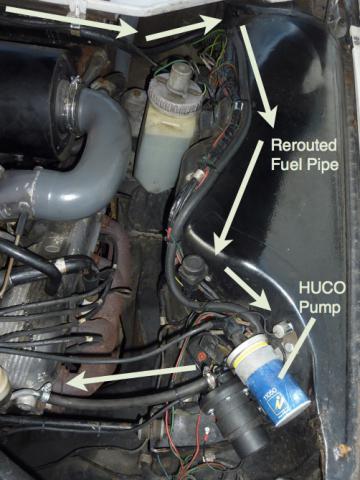
For this reason we would not recommend using a pusher pump located at the tank, or a high pressure pump. This pretty well rules out Facet type pumps. Instead we would strongly recommend a HUCO 13/3010 low pressure rotary pump located at the front of the car just behind the passenger side dipped headlamp bowl. This should be wired through an accident cut off relay, standard on modern cars and readily obtainable from a local scrapyard. That way the pump will have its electrical feed interrupted if you are involved in an accident. HUCO pumps can be bought from Gower & Lee and are sometimes available cheaper from motor sport orientated motor factors – let Google be your guide! A side benefit of this is that you retain the main/reserve petrol supply changeover facility, which is not possible with a tank mounted pump without significant modification to the lines and tap location.
Obviously the fuel pipework in the engine bay needs to be modified. The best solution is to take a new line from the point on the firewall/bulkhead where the existing line changes into a flexible hose to reach the bottom of the cylinder block under the left hand exhaust manifold. Use a minimal length of flexible fuel hose to bridge to a new length of metal fuel pipe routed behind the steering idler and out on to the top of the inner wing to bundle together with the wiring harness. From the pump, new pipework can either run to the inlet side of the existing mechanical pump – the electric pump will pump through the mechanical one quite happily – or direct to the left hand carburettor bypassing the mechanical pump which can then be removed and blanked off. When making this pipework, try to use as much metal pipe as possible.

Note that in all this we haven’t mentioned electric radiator fans. If your cooling system is unable to maintain temperature after the flushing and chemical cleaning described, the solution is a three row radiator core, not additional fans. Electric radiator fans should be used only as a replacement for the engine driven fan, to obtain better horsepower and quieter running, they are not a fix for another problem in the cooling system.
Words: Chris York
Originally published in Driving Force magazine
May 2013

